In this tutorial we are going to show you how to make Gravity Forms create a unique ID for entries. Gravity Forms by default does not have a native function that allows you to create a unique ID or ticket number for each entry. The only type of ID Gravity Forms offer is the entry ID that starts from 1 and counts up. Maybe you want to have a and unique ID that is auto generated and formatted to something like this #46023. Well today we are going to show you how to do just that!
Making Gravity Forms Create A Unique ID
Recently we were working on a website that was using Gravity Forms as a job entry system. The client wanted to have a unique ID attached to job entry that would be sent to them via a notification. To do this it is actually a very simple process by just adding a short bit of code to the functions.php file in their child WordPress theme. We though we would share it with you in-case any else ran into the same situation we have.
					<?php
/* Put a unique ID on Gravity Form (single form ID) entries.
----------------------------------------------------------------------------------------*/
add_filter("gform_field_value_uuid", "get_unique");
function get_unique(){
    $prefix = "SLP2017-"; // update the prefix here
    do {
        $unique = mt_rand();
        $unique = substr($unique, 0, 8);
        $unique = $prefix . $unique;
    } while (!check_unique($unique));
    return $unique;
}
function check_unique($unique) {
    global $wpdb;
    $table = $wpdb->prefix . 'rg_lead_detail';
    $form_id = 3; // update to the form ID your unique id field belongs to
    $field_id = 7; // update to the field ID your unique id is being prepopulated in
    $result = $wpdb->get_var("SELECT value FROM $table WHERE form_id = '$form_id' AND field_number = '$field_id' AND value = '$unique'");
    if(empty($result))
        return true;
    return false;
}
We are going to shout out to David from Gravity Wiz as he is the one who created this code snippet.
A Few More Steps
What this code snippet does is it uses a Hidden Field (Advanced Tab Field). The script then puts your prefix if you’ve added one, along with an unique ID. So now that you have added the code snippet about to your functions.php. Go to your form that you want to add the unique ID to and add a Hidden Field and add the Parameter Name listed below:
In the Parameter Name of your Hidden Field type, uuid

Next, you can change the prefix on line 6 of the code snippet to what you’d like it to be.
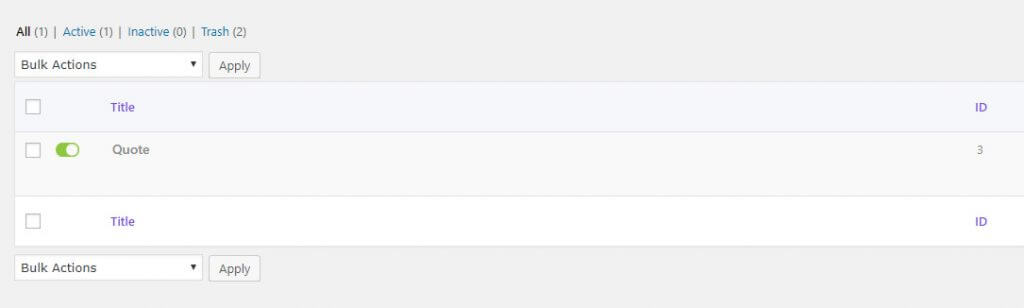
Now, change the Form ID on line 21 of the code snippet to your form. In the picture below you can see ours is 3.
And last but not least, change the Field ID on line 22 of the code snippet to the ID of the Hidden Field you just added. In the example below that ID is 33.

In Summary
If you followed the steps above correctly you should now have a hidden field that makes Gravity Forms create a unique ID for each entry. If you are having any issues, leave a comment below and we will try to help you out as best as we can! We hope that you found this blog article and David from Gravity Wiz’s code snippet was useful to you. If you want a more advanced version of this code snippet check out the WordPress Plugin called Gravity Form Unique ID.